

How to Create Your First Automation
Build a simple if-this-then-that rule that reacts automatically to an inbound message, a new conversation, or a resolved chat.
Tutorial video coming soon
What You'll Learn
In this tutorial you'll learn:
- Choose a trigger event
- Add a condition and an action
- Turn a rule on or off
Step-by-Step Guide
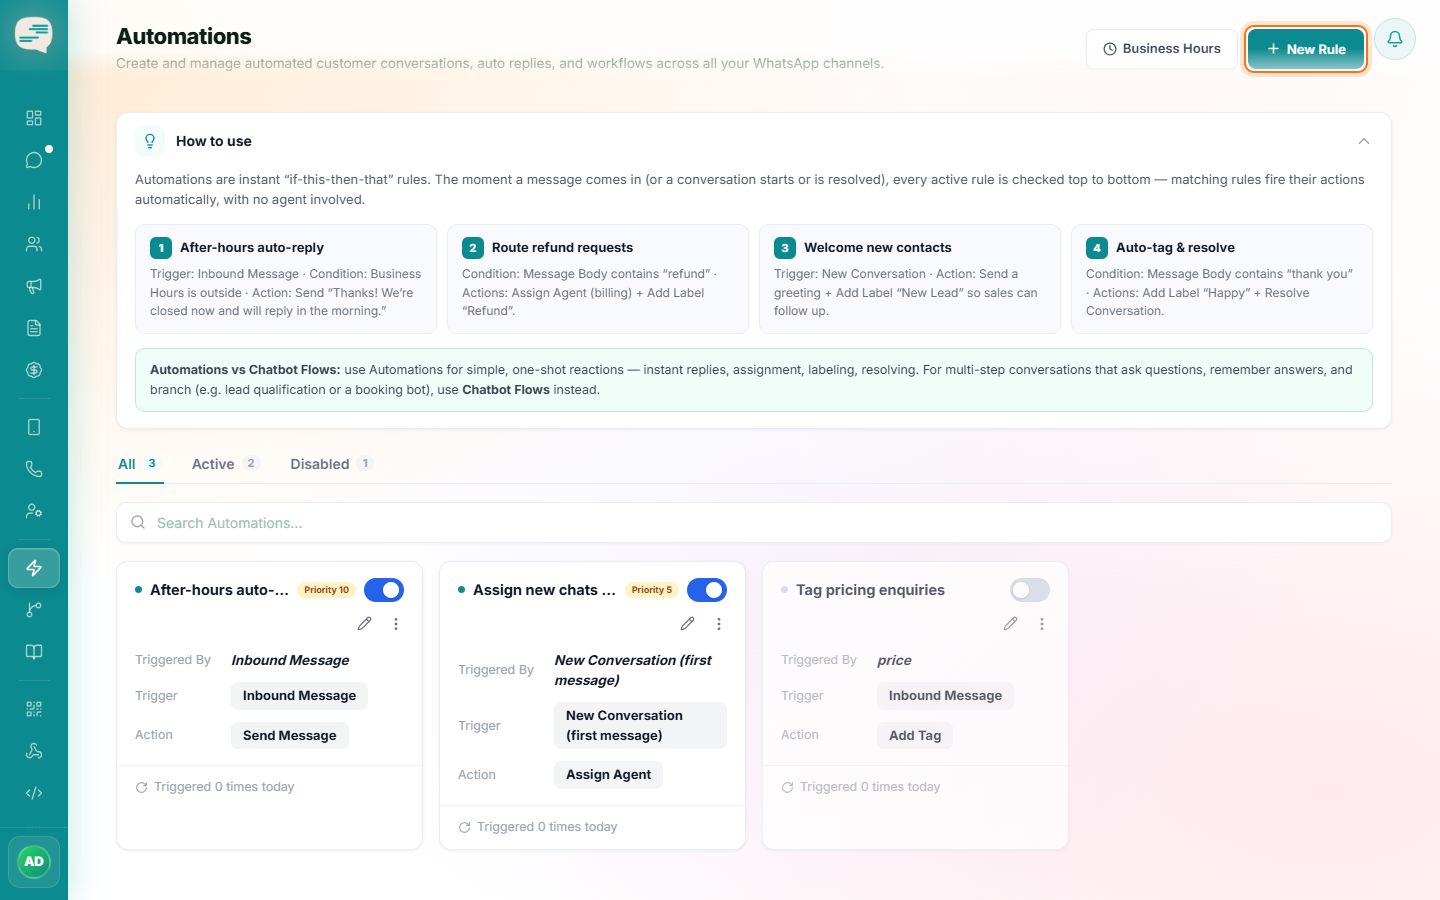
Create a new rule
Give it a name, e.g. "After-hours auto-reply".
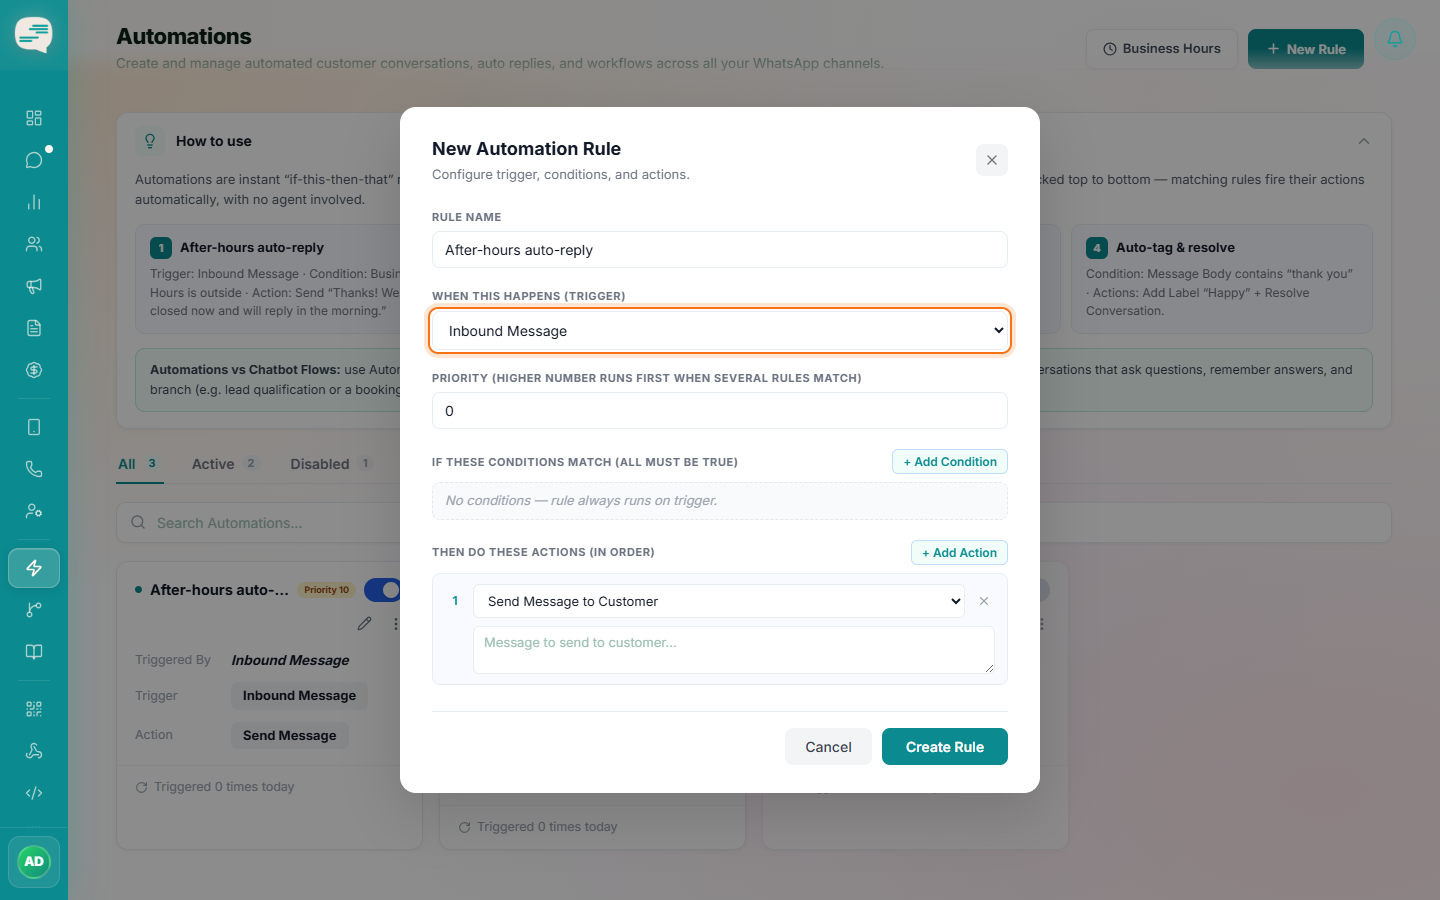
Choose a trigger
Pick the event that fires this rule: Inbound Message, New Conversation, Conversation Resolved, or Payment Received.
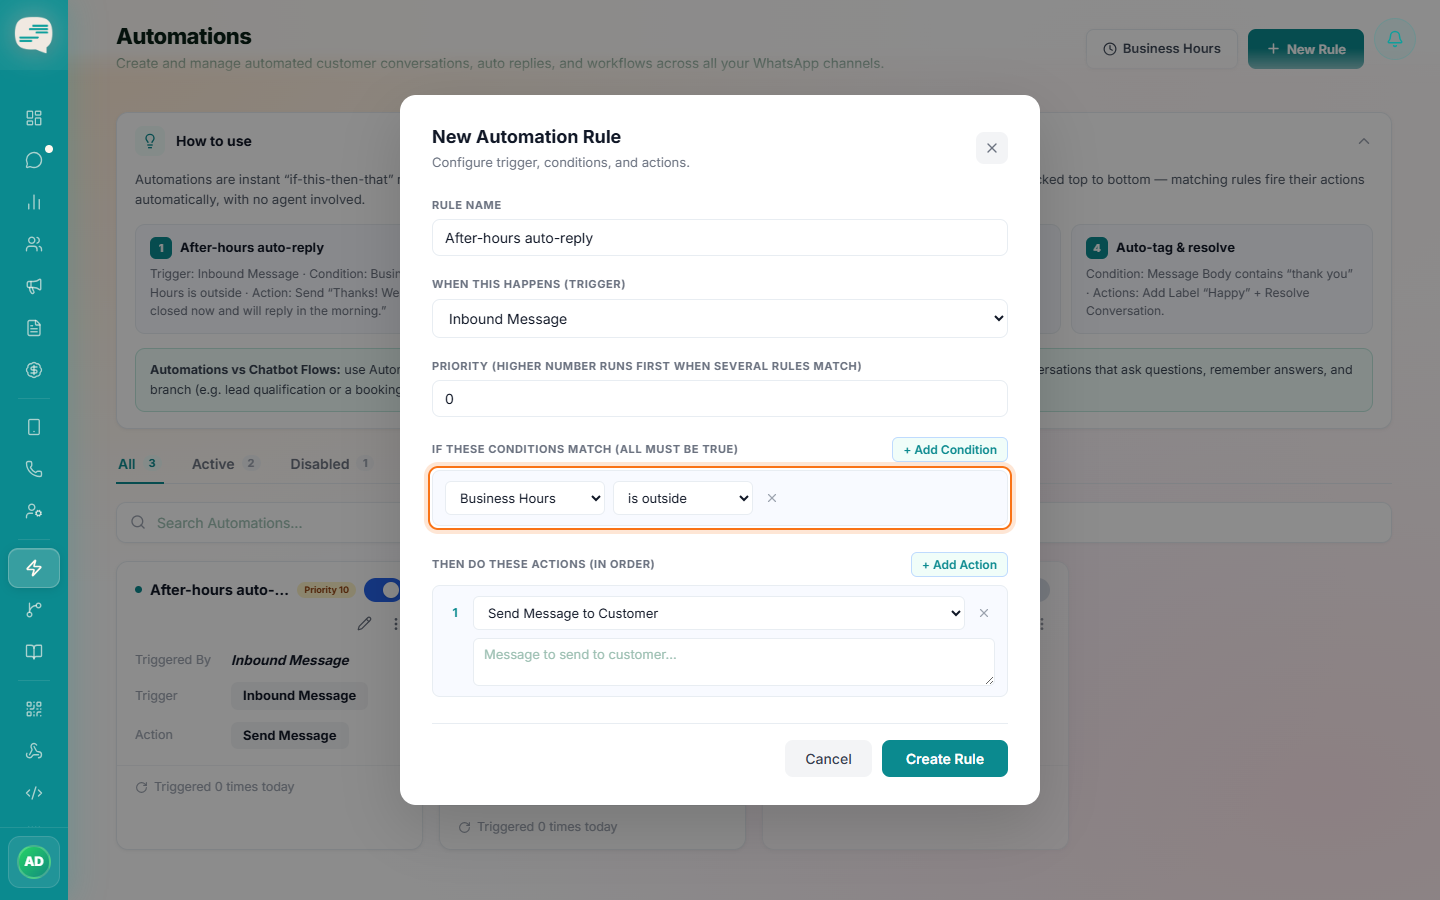
Add conditions (optional)
Narrow when the rule fires — for example, only when the message body contains a certain word, or only outside business hours. A rule with no conditions always fires on its trigger.
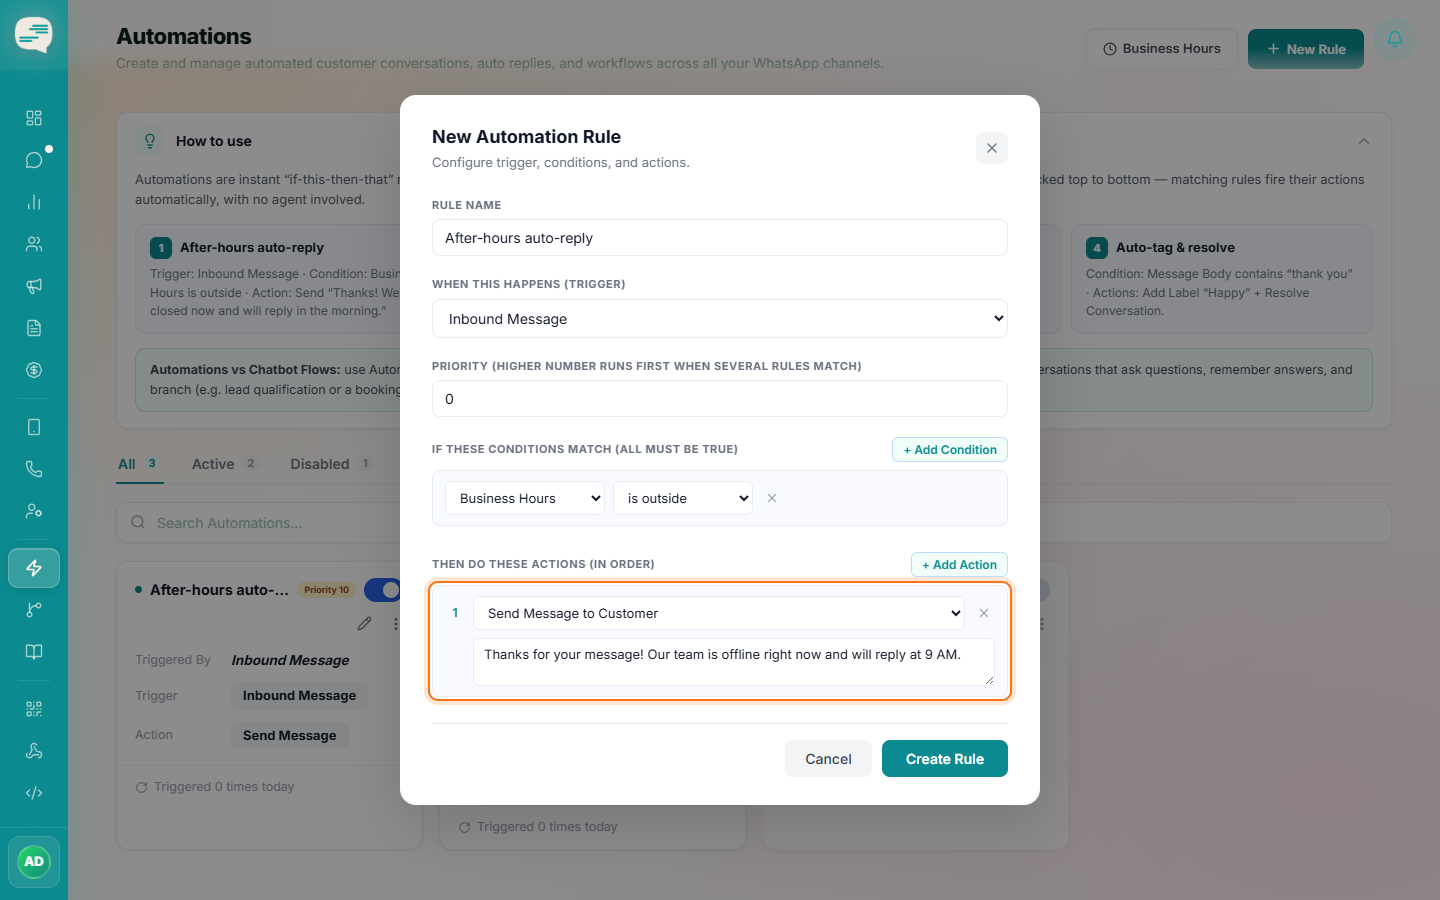
Add actions
Choose what happens when it matches: send a message or template, add an internal note, assign an agent, add or remove a label or contact tag, or resolve/reopen the conversation. You can chain multiple actions in order.
Set priority and activate
Set a priority if you have several rules that could match the same event (higher runs first), then switch the Active toggle on.
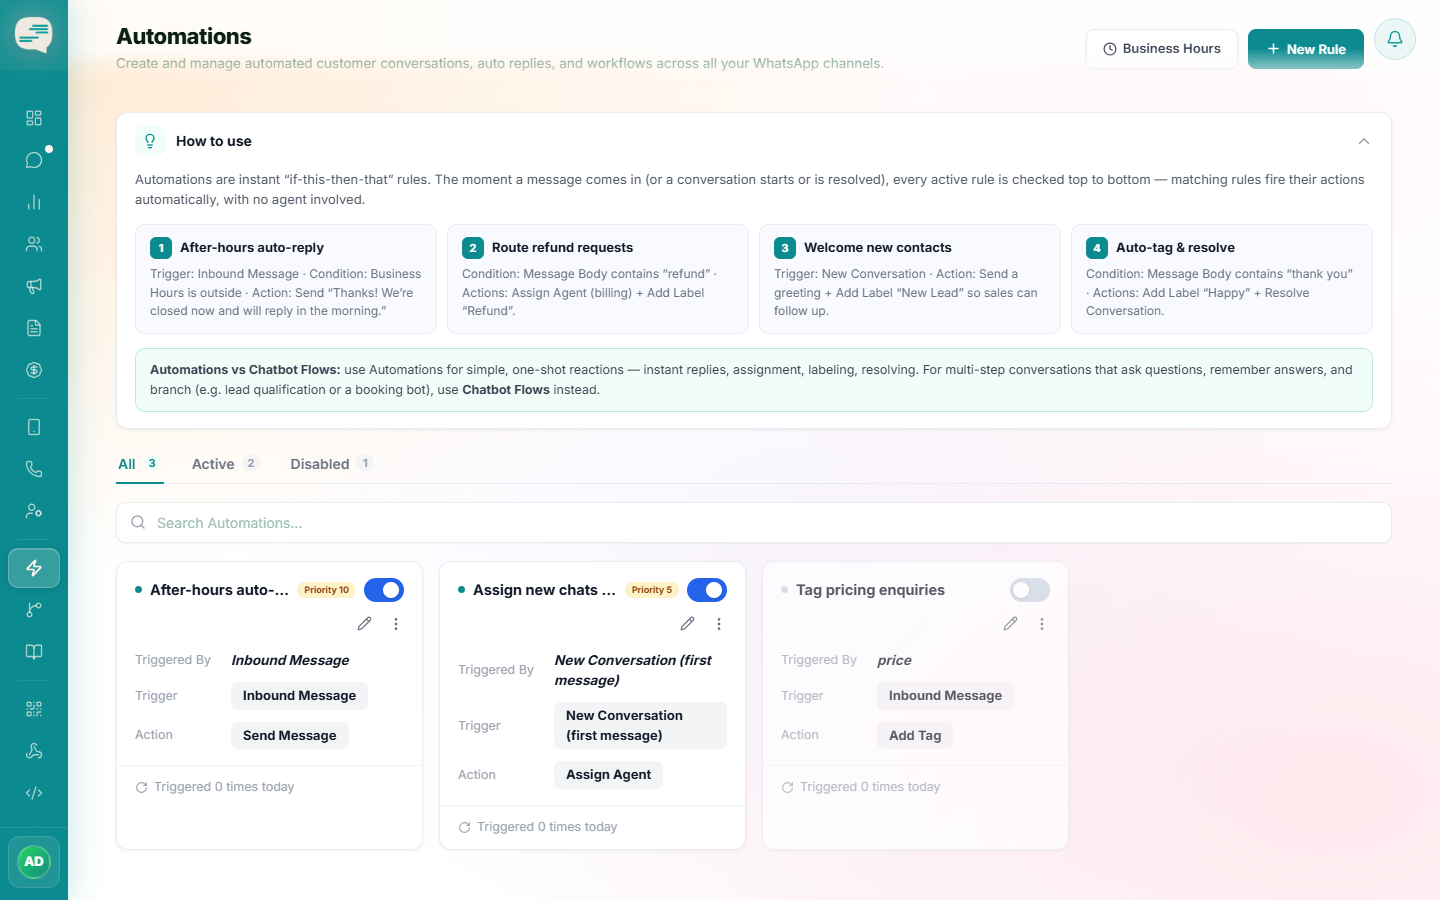
Multiple rules can fire for the same event — order them with priority to control which runs first.