

How to Add Labels to Conversations
Create colour-coded labels and apply them to conversations to organise and filter your inbox.
Beginner 3 min read
Tutorial video coming soon
What You'll Learn
In this tutorial you'll learn:
- Create a new label
- Apply a label to a conversation
- Filter the inbox by label
Step-by-Step Guide
1
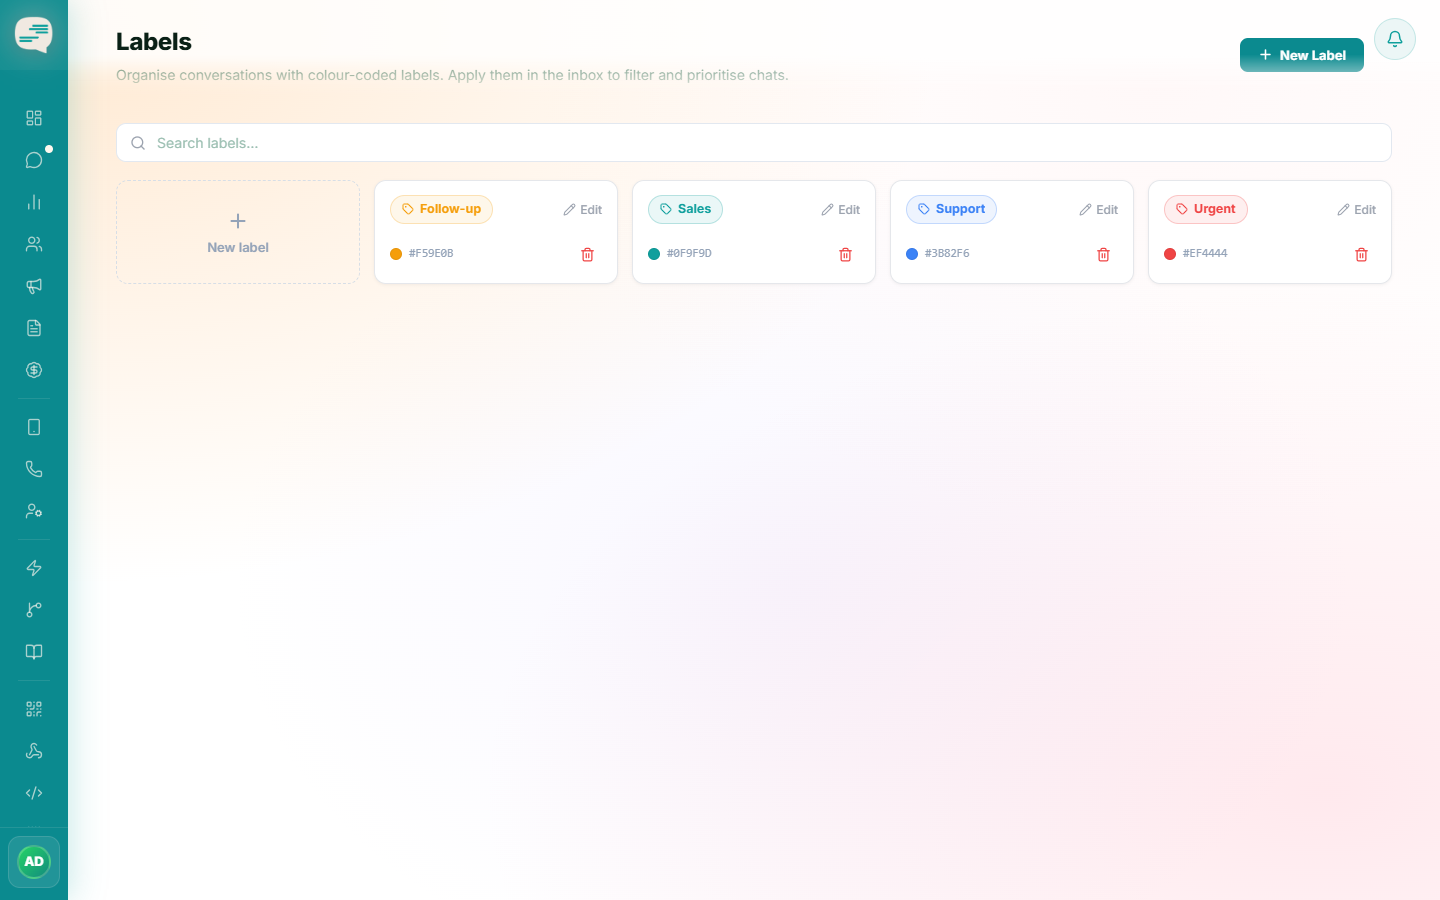
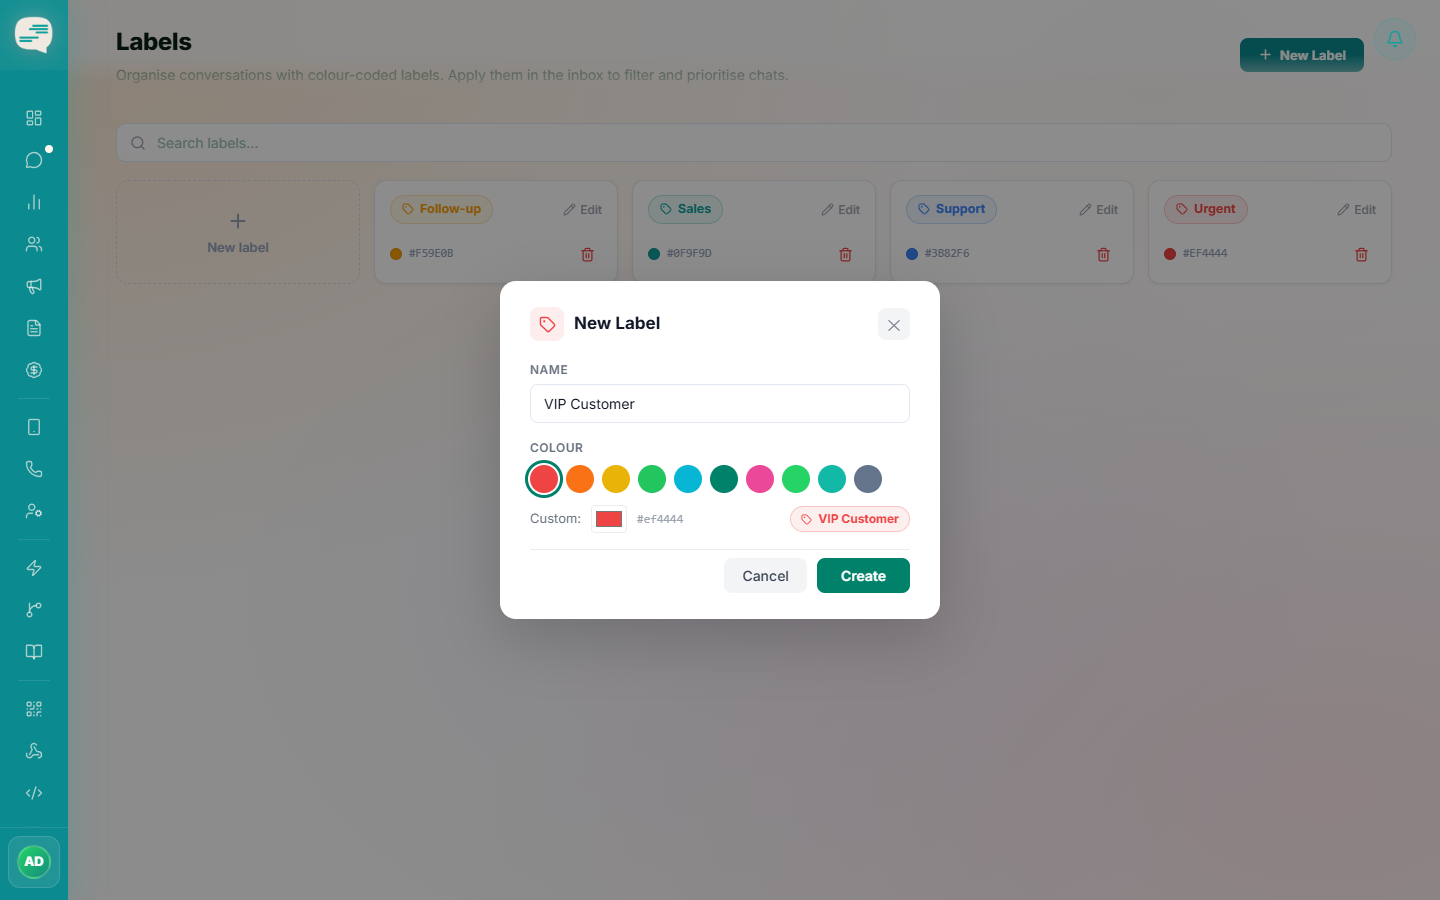
Create a label
Dashboard → Settings → Labels → New Label
Give it a name and pick a colour from the presets, or use the colour picker.
2
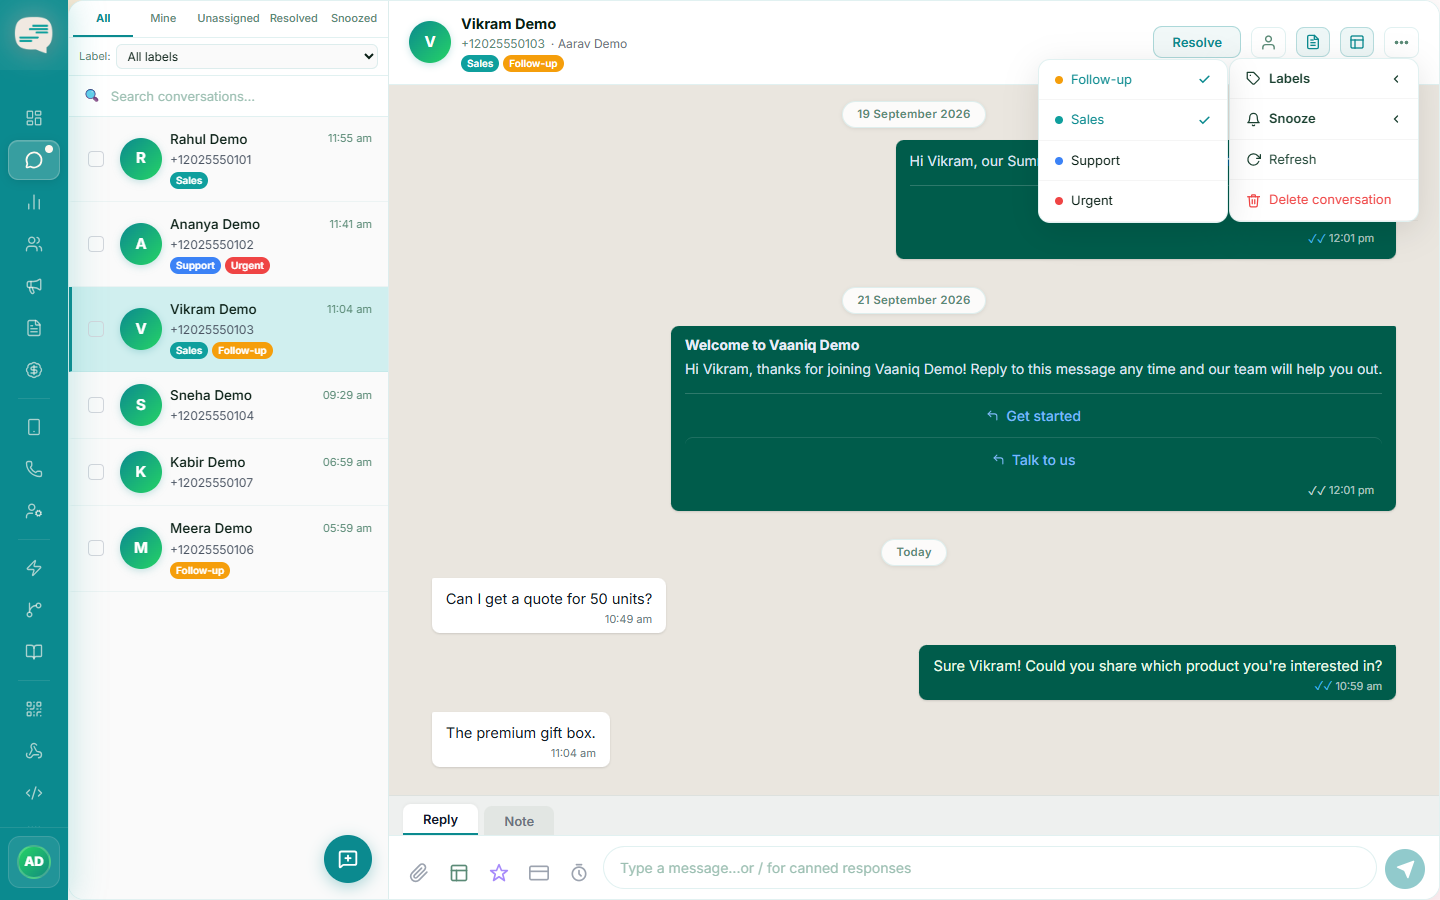
Apply it to a conversation
Open a conversation, click the label icon, and select one or more labels to attach.
3
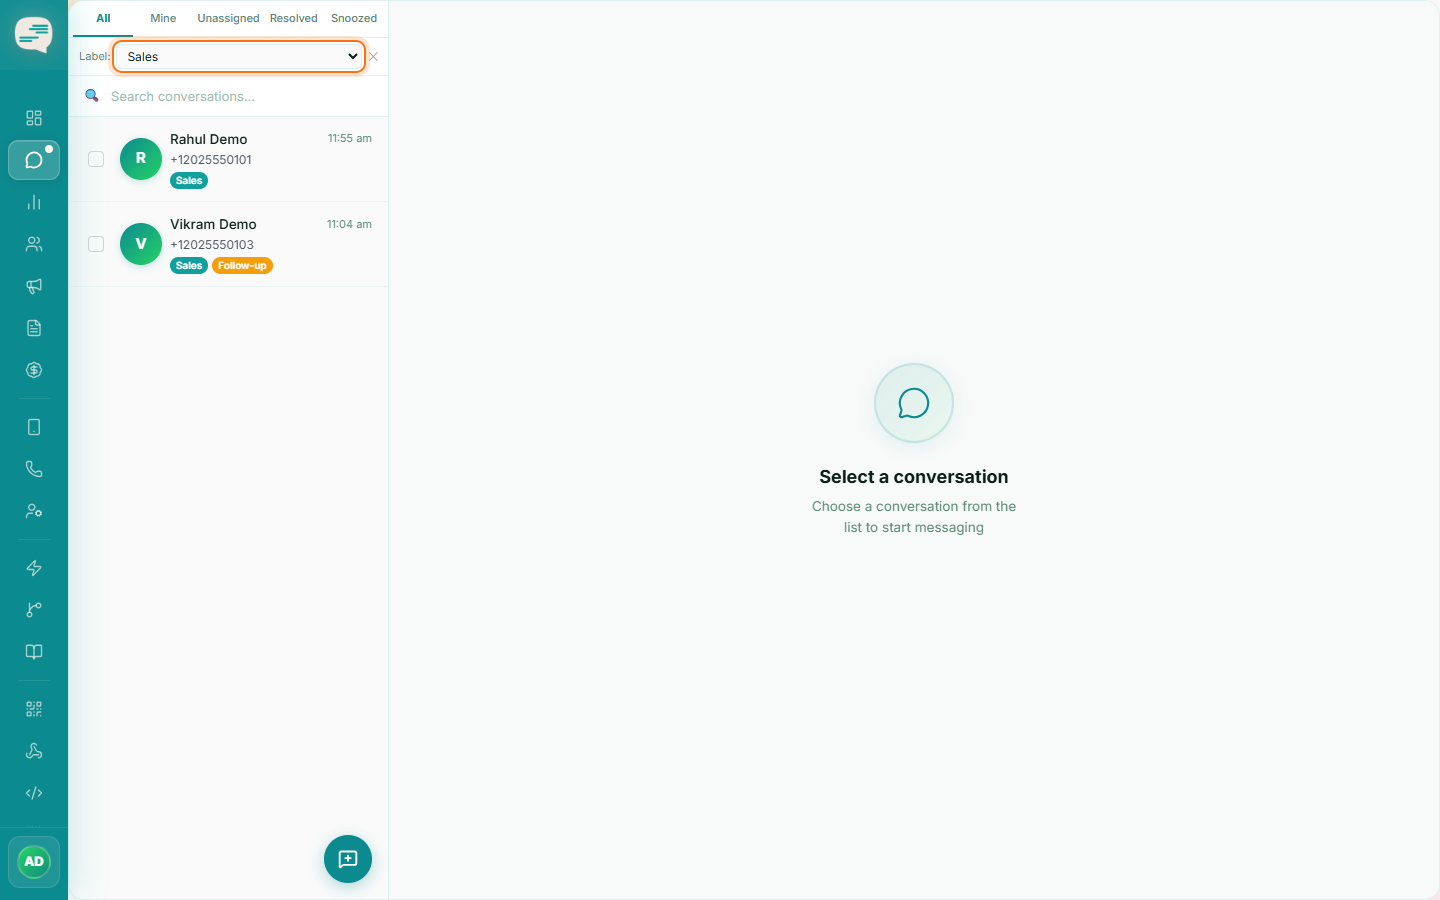
Filter by label
Use the label filter in Conversations to focus on a specific category of chats.
Tip
Labels apply to conversations. Contacts have a separate, similar-looking feature called Tags — see Create & Use Contact Tags.