

How to Create an API Key
Generate a scoped API key to authenticate requests from your own systems into Vaaniq's Messaging API.
Intermediate 3 min read
Tutorial video coming soon
What You'll Learn
In this tutorial you'll learn:
- Create an API key with the scopes it needs
- Authenticate a request with it
Step-by-Step Guide
1
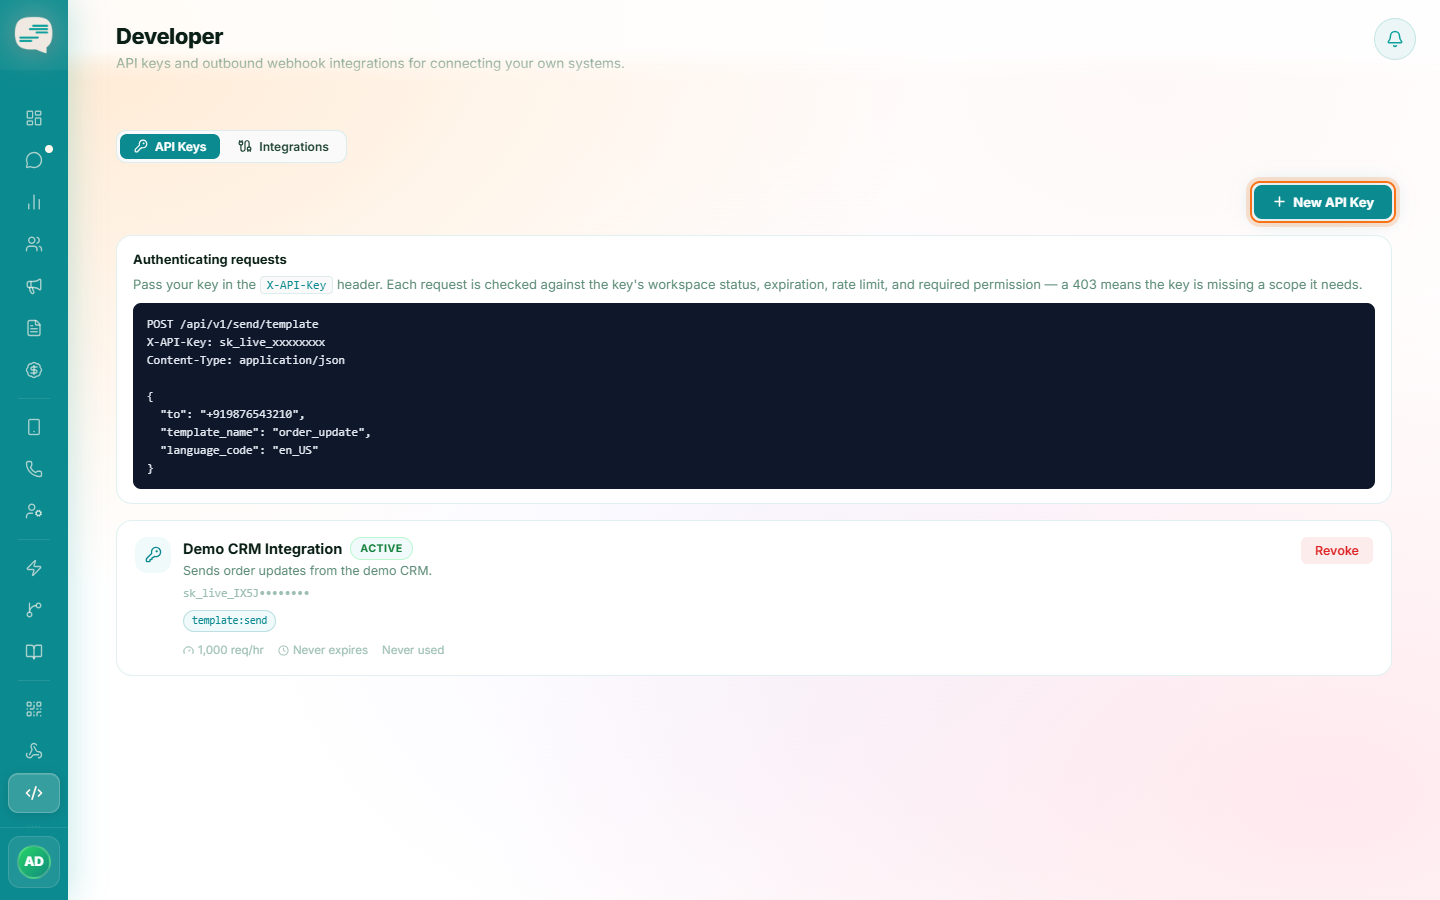
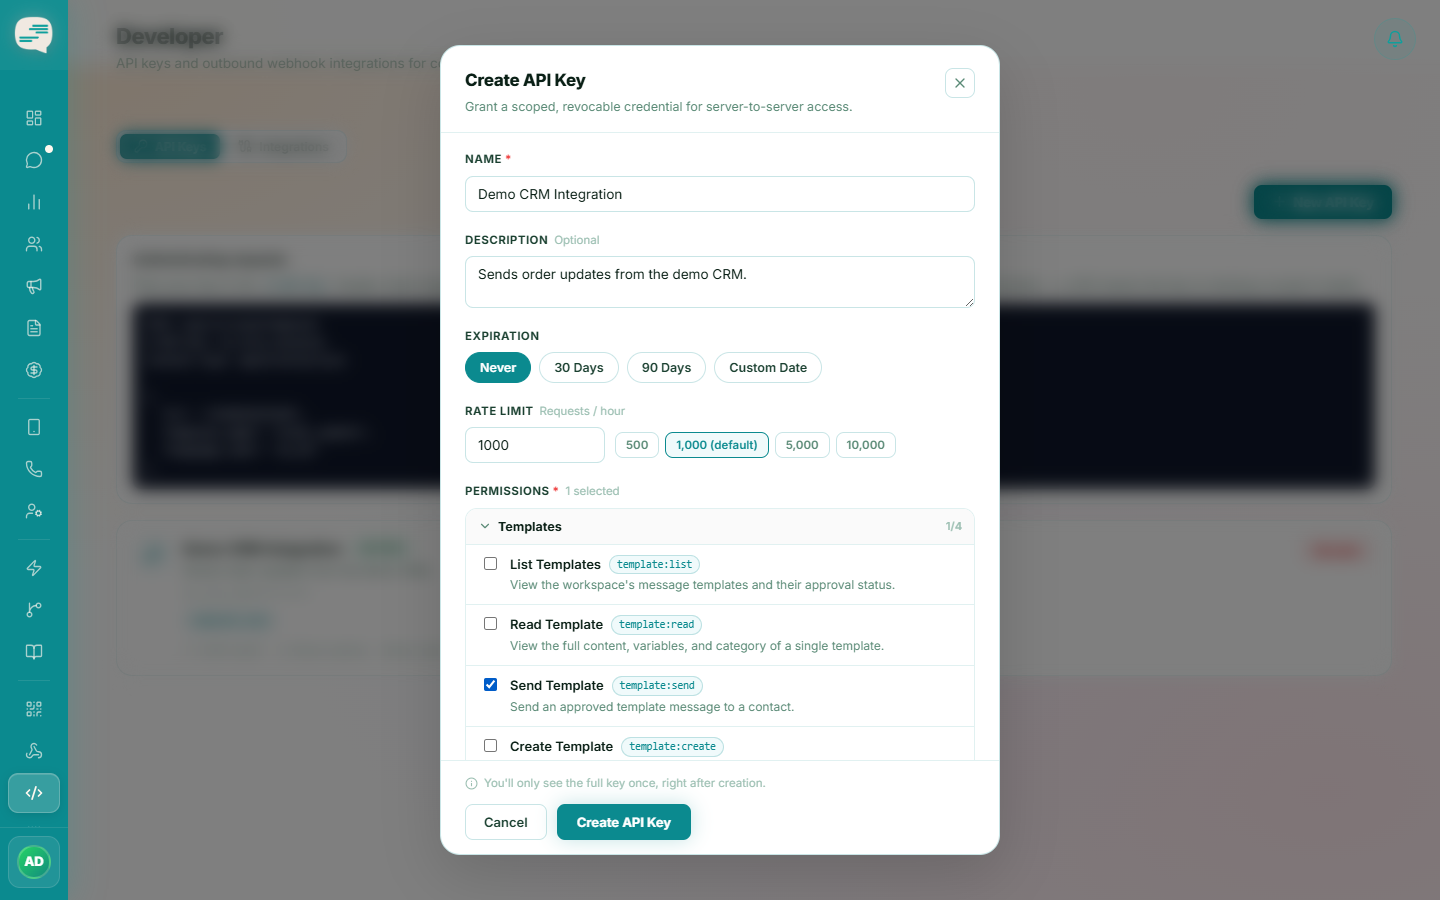
Create a key
Dashboard → Settings → Developer → API Keys → Create API Key
Give it a descriptive name, e.g. "CRM Integration", and choose which scopes it needs, such as template:send.
2
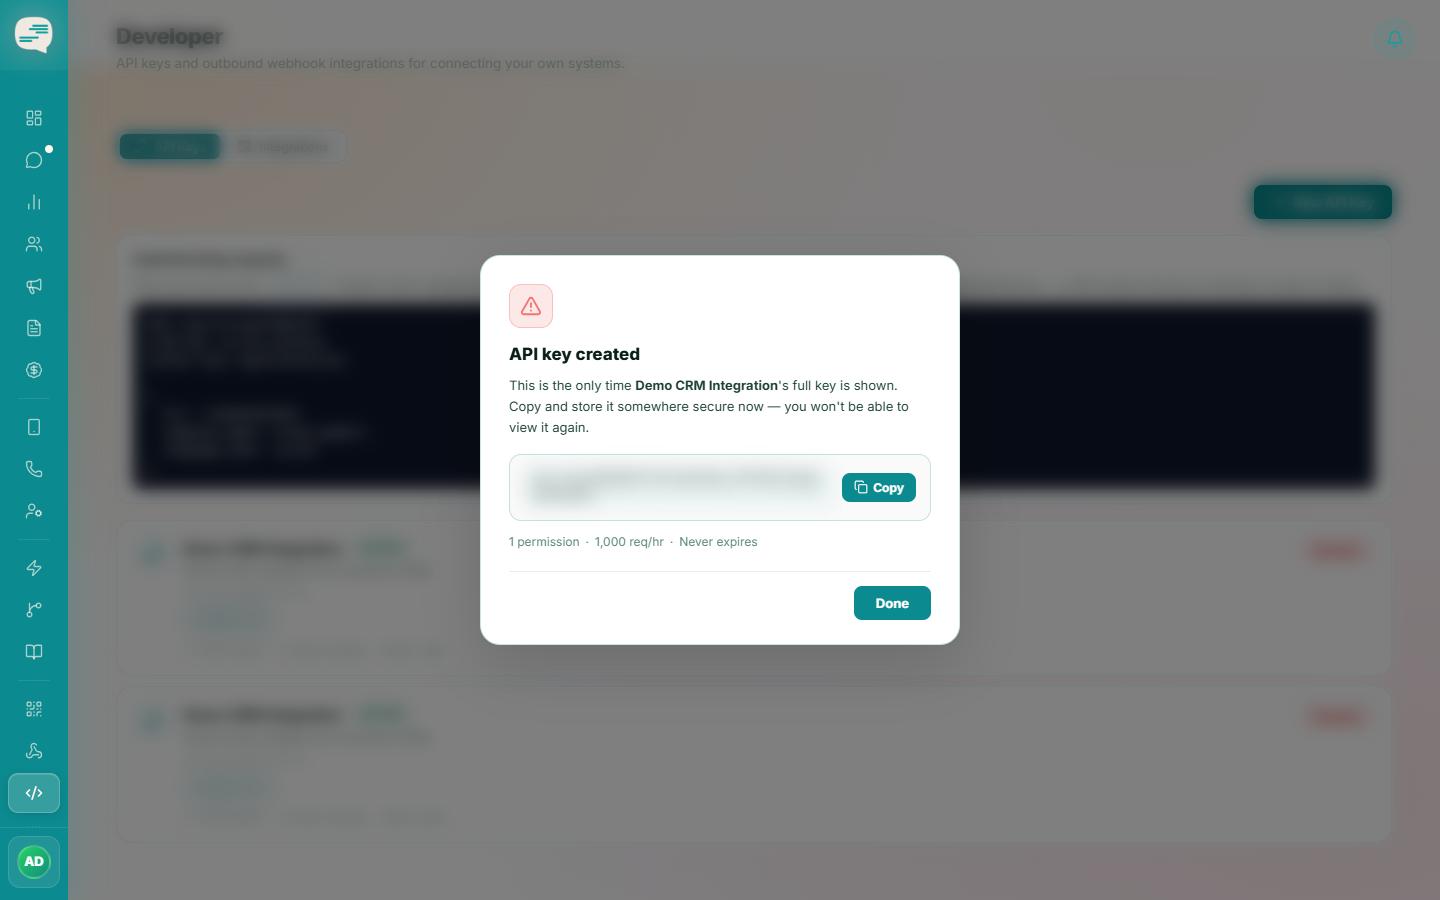
Copy it immediately
The full key is only ever shown once, right after creation — copy and store it securely before closing the dialog.
3
Use it in requests
Send it in an X-API-Key header on every request, not as a Bearer token.
Tip
An API key's permissions come entirely from the scopes you assign it, not from your own user role — pick only the scopes it actually needs.
Tip
Delete a key immediately if it's ever exposed or no longer needed — this revokes access right away.